Automation saves time and therefore money. However, you have to ask yourself if it’s worth spending hours writing a complex and long script. In the worst case you might end up wasting instead of saving time. Thankfully most programming related tasks can be automated very quickly and each language or framework often has documentation on how to get you up and running.
This is sadly not often the case when it comes to game development. Popular engines like Unreal Engine and Unity have automation tools1 and documentation for automating the build process but less popular ones such as RPG Maker don’t have those.
In this post I will explain what CI/CD means and how to set up a pipeline for RPG Maker MV/MZ with rpgmpacker. A big chunk of this post is explaining CI/CD and how RPG Maker MV/MZ works, if you just want to go to the practical part click here.
CI/CD for non-programmers
RPG Maker is very non-programmer friendly, and you can easily end up not having to write a single line of code when creating a game with it. For this reason I want to make sure we all have the same base level understanding of CI/CD before continuing. That being said, I expect you to know about version control with git so make sure to watch these two amazing videos by Fireship if you are unfamiliar with it:
Let’s get started with Continuous Integration which means running a pipeline on every change you commit to a repository. This pipeline consists of one or multiple jobs where one job could be running some tests or building the project. If you run the tests on every change then you can easily track down the commit where a bug was introduced to the codebase. A common pipeline would look like this:
- setup (checkout, getting all the tools)
- running tests
- building the project
- packaging
- uploading an artifact (fancy word for an archive containing the output)
The terminology can be different depending on your provider for example a pipeline on GitHub is called a workflow and each workflow has steps instead of jobs. They often mean the same thing so don’t let that confuse you.
Continuous Delivery is about delivering the artifact we produced previously. This artifact can be sent to testers, friends or the QA team. Continuous Deployment is also a thing and means actually deploying the artifact by uploading the next release of a game to itch.io or deploying the software to your servers.
Big studios often end up with huge pipelines because they have many employees and teams. They might have a CI pipeline that runs the tests and builds the project. The artifact would then send in a CD pipeline to the testers or QA team and when they approve of the build it gets released into the world. This is probably not the case for you or your team and most of the time you can combine all of this into one pipeline.
If you are curious how such a pipeline might look like, here is the GitHub Actions workflow file that builds (CI) and deploys (CD) this site to GitHub Pages on every push to the master branch:
| |
RPG Maker MV/MZ manual export
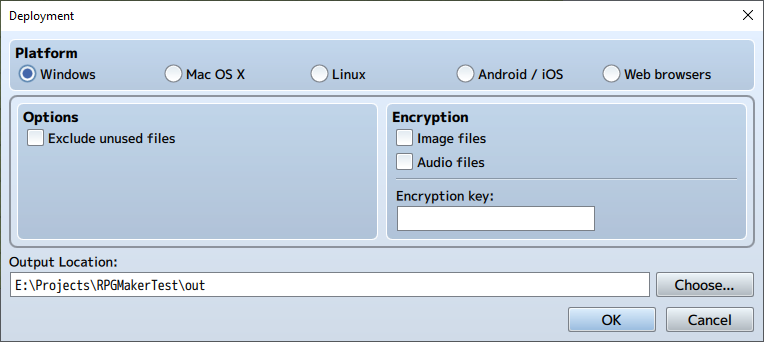
RPG Maker MV Deployment Window
This is the deployment window of RPG Maker MV which you can access in the editor under File -> Deployment. The major issue with this is the fact you have to use it at all. Software developers love the tools they can use from the command line because they can be easily accessed using a script.
Other engines like Unreal Engine have to compile code before deployment, but RPG Maker is very different: It’s only copying files from one place to another.
There is no code to compile because all the code is in JavaScript, it doesn’t even need to compile an executable because it just uses NW.js. RPG Maker is one of the simplest game engines, not just in terms of usability but how everything is just JSON and JavaScript. You can literally go into the js folder and look at all the source code of the engine. All the data is saved as JSON so if you want to change the name of an item you can open data/Items.json and change the values.
If you are curious where all those files come from, open your RPG Maker MV/MZ installation folder and look for folders that start with nw-js-. The files inside those folders are copied over to the output directory. You can also find the default template files in the NewData folders.
Simply copying files from one place to another can be done with a script. This was exactly what rpgmpacker did in my first prototype, but I soon realized that there was more going on.
First we have file filtering. For audio, you can have .ogg and .m4a files but exporting for Windows/OSX will only copy the .ogg files while exporting for Mobile will only copy .m4a files. Then we have image and audio “encryption” and the exclude-unused feature which requires parsing of almost all JSON files to figure out which files are actually in use and which are not. There is even more to this which can’t be done in a simple script, so I decided to build an entire tool which we are going to use in the pipeline.
Creating a Release Pipeline for RPG Maker
The pipeline we are going to build will do the following:
- run rpgmpacker
- zip the output
- upload the output to itch.io using Butler
If your game is not on itch.io then you can leave out the last step or replace it with an upload to MEGA, GDrive or your hosting platform of choice.
For the pipeline you can write a Bash or PowerShell script, just pick whatever you like more:
| |
| |
In my case I have the project in a folder called MyProject next to the script and the output should go into the build folder. I’m using the Steam version of RPG Maker MV for this but any version of MV or MZ can be used.
Next up we want to zip the output. rpgmpacker will create an output folder for each platform you specified so for me I will have build/Windows, build/OSX and a build/Linux folder.
| |
| |
This is where the difference between PowerShell and Bash start to appear. In Bash, we use a glob to get all top-level items of the output directory and in PowerShell we use the Get-ChildItem function. They look different, but they do the same thing with the main difference being that platform in Bash will be ./build/Windows while $platform in PowerShell will be just Windows. This is why we need to prefix $platform with $OUTPUT/ when calling 7z.
The pipeline is almost done at this point. Next is publishing the output with Butler to itch.io but if you are not using that platform you are now done.
| |
| |
If you are not on Windows you should change the ButlerChannel variable to darwin-amd64 or linux-amd64 depending on your system. I recommend checking the channel list of Butler if you need something different. I’ve added a simple check, so we don’t download Butler whenever we call the script. Before we continue you should get an API key from itch.io. You should treat API keys like passwords and should never make them public. A good way of storing API keys is with environment variables and Butler expects the API key to be stored in the BUTLER_API_KEY environment variable.
| |
| |
I recommend that you look at the Butler Docs for the different channels you can push to. To recap here are both complete scripts:
Finished Scripts
| |
| |
Conclusion
I hope this blog post helped you with getting a CI/CD pipeline up and running for your RPG Maker game. Please let me know if you end up using this tool for your next project. The author of Star Knightess Aura (NSFW) was one of the earliest users, and you can find their pipeline in this repo on gitgud.
Unreal Engine has Automation Tools and Unity has a CLI ↩︎